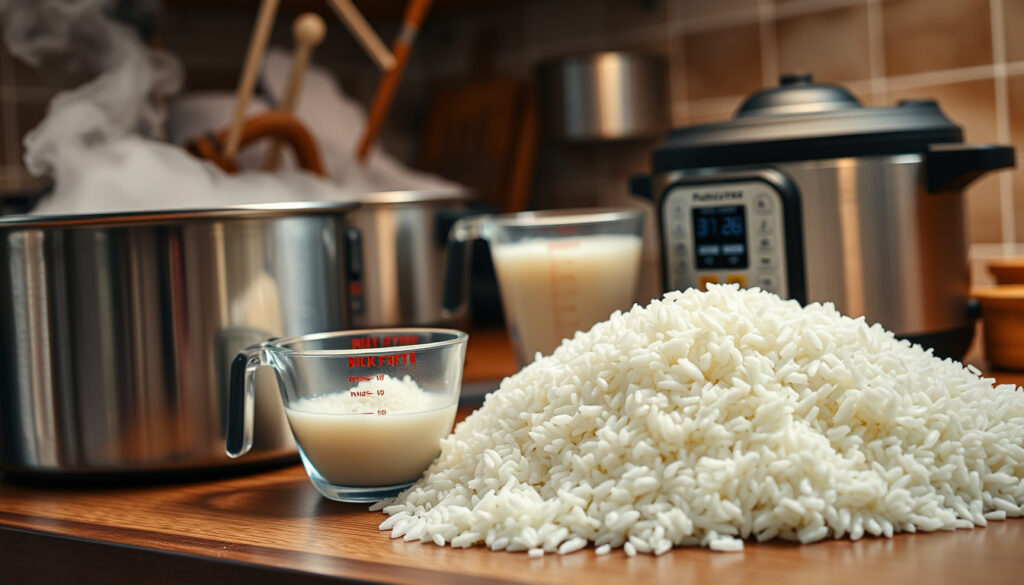
How to Cook Rice – Perfect Ratios for Every Method
Rice has sustained civilizations for millennia, yet achieving that perfect texture—separate grains that are tender without being mushy—continues to challenge home cooks. Whether serving as a simple side dish or building the foundation for elaborate meals, the difference between excellent and mediocre rice often comes down to understanding a few fundamental principles. This guide covers the essential ratios, techniques, and troubleshooting strategies that work across multiple cooking methods.
The science behind fluffy rice begins with starch management. Surface starch on uncooked grains gelatinizes during cooking, causing individual grains to stick together if left untreated. Rinsing under cold water until the liquid runs clear removes this excess starch, allowing each grain to remain distinct. Combined with proper water ratios and adequate resting time, these steps transform ordinary rice into something genuinely impressive.
Different cooking methods require different approaches. Sealed appliances like electric pressure cookers trap steam and eliminate evaporation, meaning a 1:1 water-to-rice ratio produces optimal results. Open pots on the stovetop lose moisture to the air, necessitating additional water—typically one and a half to two parts liquid per part rice. Understanding these fundamentals prepares cooks to adapt techniques across any equipment they have available.
What’s the Perfect Water-to-Rice Ratio?
Getting the ratio right forms the cornerstone of successful rice cooking. While slight variations exist between methods and rice varieties, certain standards apply across most kitchen setups.
Key Insights for Every Method
- Rinsing removes surface starch that causes clumping—continue until water runs clear
- Resting time after cooking allows moisture to distribute evenly throughout grains
- Sealed cooking vessels require less water due to zero evaporation losses
- Brown rice needs more liquid and significantly more cooking time than white varieties
- Adding a small amount of oil or salt helps prevent sticking and improves texture
- Altitude, rice age, and specific appliance models may require minor adjustments
| Rice Type | Stovetop Ratio | Pressure Cooker Ratio | Cook Time |
|---|---|---|---|
| White (Jasmine/Basmati) | 1:1.5 | 1:1 | 15-20 min |
| Brown | 1:2-2.5 | 1:1 | 40-45 min |
| Basmati (White) | 1:1.5 | 1:1 | 15-20 min |
| Basmati (Brown) | 1:2 | 1:1 | 22-24 min pressure |
How to Cook Rice on the Stovetop: Step-by-Step
The stovetop method represents the most traditional approach, offering direct control over the cooking process. While it requires more attention than sealed appliances, many cooks prefer the tactile feedback and consistent results when mastered.
White Rice on the Stovetop
Begin by measuring one cup of rice into a fine-mesh strainer. Run cold water over the grains while gently rubbing them with your fingers. The initial liquid will appear cloudy; continue rinsing until it runs nearly transparent, typically two to four cycles. This step removes the loose surface starch responsible for stickiness.
Transfer the rinsed rice to a heavy-bottomed pot with a tight-fitting lid. Add one and a half parts water for each part rice—approximately one and a half cups of water for one cup of rice. A pinch of salt enhances flavor without affecting texture. Place the pot over high heat and bring to a full boil, which typically takes five to seven minutes depending on your stove.
Once boiling, reduce the heat to its lowest setting and immediately cover the pot. Resist any urge to lift the lid during cooking—escaping steam is essential for proper heat distribution. White rice cooks in fifteen to twenty minutes, while brown varieties require forty to forty-five minutes. Remove from heat and let stand covered for ten minutes to allow residual moisture to absorb fully.
Surface starches gelatinize at different rates during cooking. When not removed, these starches cause adjacent grains to bond together, creating clumps instead of fluffy, separate grains. Thorough rinsing addresses this issue at its source.
Brown Rice Adjustments
Brown rice contains the bran layer that commercial mills remove from white rice. This fibrous coating acts as a barrier, slowing water absorption and requiring extended cooking time. Increase the water ratio to approximately two to two and a half parts liquid per part rice. Simmer for forty to forty-five minutes instead of twenty, and extend the resting period to fifteen minutes for optimal results.
Rice Cooker Method: Simple Instructions
Electric rice cookers automate the cooking process, using built-in sensors to detect when liquid has been absorbed and temperatures drop. This makes them particularly valuable for busy households or those new to cooking rice. The consistent results require minimal active attention once the ingredients are added.
Measure and rinse the rice using the same technique as stovetop preparation. Transfer to the cooker insert and add water according to the manufacturer’s guidelines—typically one to one and a quarter parts liquid per part rice. These appliances compensate for evaporation internally, producing reliable results with less water than open-pot methods.
Add salt or a small amount of oil if desired for flavor enhancement. Select the appropriate setting for your rice type—most cookers have distinct programs for white and brown rice. The machine will automatically switch to a warm setting when cooking completes. Allow a ten-minute rest period inside the covered cooker before opening and fluffing with a fork. For those seeking guidance on advanced pressure cooker techniques, resources on how to cook perfect rice in an Instant Pot provide detailed troubleshooting and method comparison, and you can also learn more about the Ferrari 2026 Formula 1.
Rice cookers excel at producing consistent results across multiple batches. They also keep rice warm for extended periods without drying out, making them practical for meal prep or entertaining. For those seeking guidance on advanced pressure cooker techniques, resources on how to cook perfect rice in an Instant Pot provide detailed troubleshooting and method comparison.
How to Fix Common Rice Problems (Mushy, Sticky, Undercooked)
Even experienced cooks encounter texture issues occasionally. Understanding the root causes helps identify appropriate corrections for future batches.
Mushy or Sticky Rice
Mushiness results from excessive moisture penetrating the grain structure, breaking down cell walls and creating a soft, clumped texture. The most common cause is insufficient rinsing—surface starch remains and creates a glue-like coating during cooking. Additional factors include using too much water, overcooking, or inadequate resting time before uncovering.
To prevent mushiness, ensure thorough rinsing before cooking. Measure water precisely rather than eyeballing quantities. If using a rice cooker, avoid lifting the lid during the cooking cycle. For stovetop methods, complete the full resting period without peeking.
Spread slightly overcooked rice on a baking sheet and place in a 300°F oven for five to ten minutes. The dry heat evaporates excess moisture and can salvage rice that is mildly mushy without starting over.
Undercooked or Hard Grains
Insufficient cooking leaves starches only partially gelatinized, resulting in a firm, chalky texture at the center of each grain. This commonly occurs when water is absorbed before starches fully swell, when heat was too low during simmering, or when the resting period was skipped prematurely.
Add one quarter cup of water to the pot, return to low heat, and cook covered for an additional five to ten minutes. Alternatively, extend the natural release period if using a pressure cooker. For particularly stubborn cases, wrap the rice in a clean kitchen towel, place in a warm oven for twenty minutes, and allow carryover heat and moisture to complete the process.
Burnt Bottom
A scorched layer develops when direct heat contacts rice at the pot’s base before residual moisture dissipates. Prevention involves using adequate water, maintaining appropriate heat levels, and ensuring even distribution of grains before cooking begins. If burning occurs, transfer the unburnt rice to a clean container immediately and avoid scraping the darkened bottom layer, which may contain bitter compounds.
Cooking Time and Process: A Step-by-Step Timeline
Understanding the chronological progression of rice cooking helps cooks recognize each stage and intervene appropriately when necessary.
- Preparation (5 minutes): Measure rice and rinse thoroughly under cold running water until liquid runs clear.
- Boiling stage (5-7 minutes): Combined water and rice reach full boiling temperature, initiating starch gelatinization.
- Simmering phase (15-45 minutes): Reduced heat allows gradual water absorption into grain interiors. White rice requires approximately fifteen minutes; brown rice needs forty to forty-five minutes.
- Natural release (5-10 minutes): Covered resting period permits moisture redistribution throughout grains, eliminating internal water concentration gradients.
- Final fluffing: Fork aeration separates grains and releases excess steam before serving.
What We Know and What Remains Uncertain
| Established Information | Uncertainty Factors |
|---|---|
| Rinsing removes surface starch effectively | Optimal rinse cycles vary by rice brand and age |
| 1:1.5 ratio works for white rice on stovetop | Exact ratio adjustments for altitude require experimentation |
| Brown rice needs more cooking time than white | Precise time varies significantly between brown rice varieties |
| Natural release prevents sudden temperature changes | Ideal release duration may vary by appliance model |
| Resting improves final texture | Optimal rest duration for different rice types not precisely established |
The Science Behind Fluffy Rice
Rice grains consist primarily of starch packed into a cellular structure. Two starch components—amylose and amylopectin—behave differently during cooking. Amylose molecules leach from damaged starch granules during cooking and contribute to firmness and separation, while amylopectin absorbs water and swells, creating softness and stickiness.
When rice cooks, water penetrates the grain exterior and triggers starch gelatinization—the irreversible transformation of crystalline starch structures into amorphous, water-absorbing matrices. Temperature controls this process: below 140°F, gelatinization proceeds slowly; between 140°F and 185°F, it progresses rapidly; above 200°F, complete gelatinization occurs quickly but risks overcooking.
The bran layer in brown rice contains oils that can oxidize over time, affecting both flavor and cooking performance. Older brown rice often requires additional water and extended cooking times to achieve the same texture as fresher batches. These factors explain why experimentation becomes necessary when cooking unfamiliar rice varieties or brands.
Nutrition Comparison
The nutritional profile differs substantially between white and brown rice varieties, primarily due to the presence or absence of the bran layer. Healthline’s comparison of brown and white rice provides detailed information on these differences.
- White Rice (per cup cooked): Approximately 205 calories, 45 grams carbohydrates, 4 grams protein, 0.4 grams fat, minimal fiber. The bran and germ removal eliminates most naturally occurring nutrients, though many processors enrich white rice with added vitamins and minerals.
- Brown Rice (per cup cooked): Approximately 215 calories, 45 grams carbohydrates, 5 grams protein, 1.6 grams fat, 3.5 grams fiber. The intact bran layer preserves naturally occurring nutrients, including B vitamins, magnesium, and phosphorus.
- Basmati and Jasmine: Similar calorie profiles to standard white rice but with distinct aromatic compounds that contribute to their characteristic flavors.
All rice varieties are naturally gluten-free, making them suitable for individuals with celiac disease or gluten sensitivity. Brown rice offers superior fiber content for digestive health, while white rice provides quick-digesting carbohydrates suitable for athletes or those needing immediate energy.
Storage and Food Safety
Proper storage preserves both quality and safety. Cooked rice should cool completely before refrigeration to prevent condensation that promotes bacterial growth. FoodSafety.gov’s storage guidelines recommend transferring to airtight containers and refrigerating within two hours of cooking. Refrigerated rice maintains quality for up to five days.
For longer preservation, freeze rice in portion-sized containers for up to six months. Thaw overnight in the refrigerator or reheat directly from frozen. To restore texture after storage, sprinkle lightly with water, cover, and heat on the stovetop over low heat or in the microwave until steam rises throughout.
It’s worth noting that leaving cooked rice at room temperature for extended periods can create conditions favorable for bacterial growth, particularly Bacillus cereus, which can cause foodborne illness. Always cool rice quickly and refrigerate or freeze promptly.
Summary
Perfect rice requires attention to three fundamentals: removing surface starch through rinsing, matching water ratios to cooking method, and allowing adequate resting time after cooking. Different methods—stovetop, rice cooker, microwave, or pressure cooker—require adjustments to account for evaporation and heat transfer characteristics. Troubleshooting common problems focuses on identifying causes: insufficient rinsing for mushy rice, inadequate cooking time for underdone grains, and excessive direct heat for burnt bottoms. With these principles internalized, cooks can produce consistently excellent results across any available equipment.
Frequently Asked Questions
Can you cook rice in the microwave?
Yes. Use a microwave-safe bowl with a loosely fitting lid. Combine rinsed rice with twice the volume of water, cook on high for fifteen to twenty minutes for white rice, stir halfway through, then rest covered for five minutes before fluffing.
How do you store cooked rice?
Cool completely, transfer to airtight containers, and refrigerate for up to five days or freeze for up to six months. Reheat with a splash of water, covered, to restore moisture and texture.
Do you really need to rinse rice before cooking?
Yes, for best results. Rinsing removes loose surface starch that causes grains to stick together during cooking. Continue rinsing until the water runs nearly clear, typically two to four cycles.
Why does my rice come out sticky even after rinsing?
Possible causes include using too much water, overcooking, or insufficient resting time before uncovering. Also verify that rinsing was thorough—if water never ran clear, surface starch remains present.
What ratio produces fluffy rice every time?
For pressure cookers and sealed appliances, use a 1:1 ratio. For stovetop cooking, use 1:1.5 for white rice and 1:2-2.5 for brown rice to account for evaporation losses.
How much water does brown rice require?
Brown rice requires approximately one and a half to two and a half parts water per part rice on the stovetop, and one part water per part rice in a pressure cooker. Cooking time extends to forty to forty-five minutes on the stovetop or twenty-two to twenty-four minutes under pressure.
Can old rice make you sick?
Cooked rice left at room temperature can develop Bacillus cereus bacteria that produce toxins resistant to reheating. Always cool rice quickly and refrigerate within two hours, or freeze for extended storage.
How long should rice rest after cooking?
Allow five to ten minutes of covered resting time after cooking completes. This permits moisture to distribute evenly throughout grains, improving texture and reducing breakage when fluffing.
More related posts
 Amazon Gift Card Balance: Check Online, Phone & More
 Codes for Dress to Impress: Active DTI List April 2026
 Whataburger 75 Cent Burgers on Aug 8: How to Claim
 Best Rocoto Relleno Near Me: Dublin & Peru Top Spots
 Jeepers Creepers 1 Cast: Full List Actors & Roles (2001)
 LSU vs South Carolina: Scores, History & Predictions
 NASCAR Race This Weekend – Food City 500 Schedule and Details
