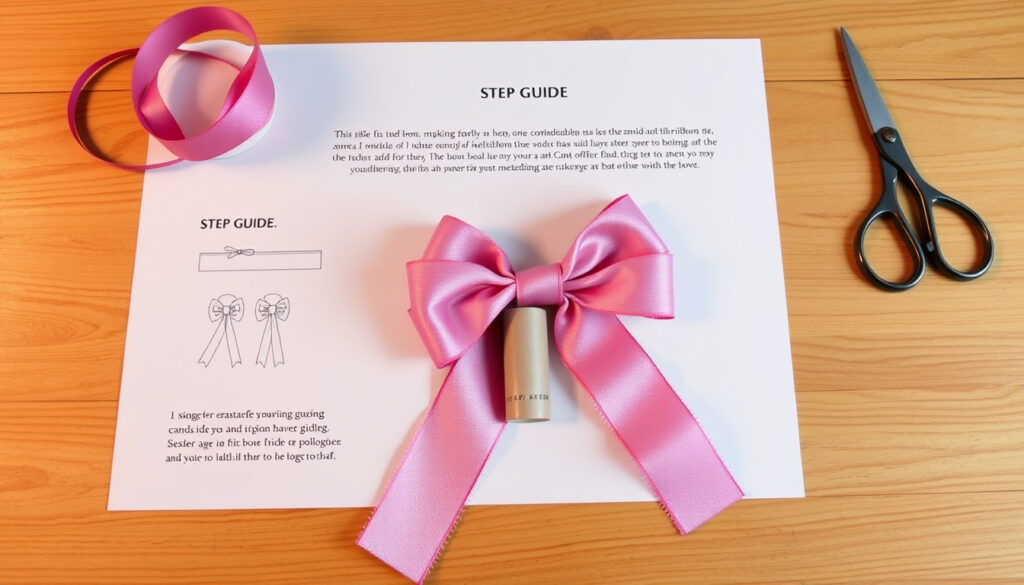
How to Tie a Bow with Ribbon: Step-by-Step Guide for Beginners
Anyone who has ever wrapped a gift and ended up with a lopsided, droopy bow knows the frustration. But tying a beautiful ribbon bow is actually a simple skill — once you master the basic technique, and this guide covers five common bow styles, from classic gift-wrap to fashion accessories, with step-by-step instructions that work every time.
Common bow loop counts: 3, 6, 8 ·
Typical ribbon length per bow: 24–36 inches ·
Estimated time to tie a basic bow: 30 seconds (expert) ·
Number of distinct bow styles in this guide: 5 ·
Most common mistake: Uneven loops
Quick snapshot
- Wired ribbon holds shape better than unwired (The DIY Playbook (DIY blog))
- Crossing left over right is standard (Sash-bow tutorial (YouTube))
- Loops should be pinched at center (Lia Griffith (craft designer))
- Exact origin of the loop bow
- Statistical data on user preferences for bow styles
- Effectiveness of different crossing methods (left over right vs right over left)
- Learning the basic technique takes about 5 minutes (Southern Home and Hospitality (lifestyle site))
- Master additional styles: gift wrapping, hair bows, dress sashes
The five key facts below summarize what you need to know before you start — from the most common bow type to the time investment required.
| Fact | Value |
|---|---|
| Most common bow type | Single-loop bow |
| Preferred ribbon material | Wired polyester (François et Moi (craft blog)) |
| Average number of loops per bow | 4–6 |
| Time to learn basic technique | 5 minutes |
| Primary use case | Gift wrapping |
How to tie a bow with ribbon step by step?
Prep the ribbon
- Cut a piece of ribbon 24–36 inches long for a standard gift bow. The size of your gift determines the exact length (François et Moi (craft blog)).
- If you’re using wired ribbon, snip the ends at a 45-degree angle to prevent fraying (Martha Stewart (home lifestyle expert)).
- Lay the ribbon flat on a clean surface with the right side facing up.
Cross and loop
- Hold the ribbon about 6 inches from one end. Create a loop by folding the ribbon back on itself.
- Cross the left tail over the right tail, then bring it under and through to form a simple knot — just like tying your shoelaces. Southern Home and Hospitality (lifestyle site) recommends wrapping the ribbon around the package first before adding the bow.
- Pull the knot tight enough to hold, but leave room to adjust the loops later.
Tie and adjust
- Form a loop on each side by pinching the ribbon between your thumb and forefinger. Cross one loop over the other, pull it through the center hole, and tighten gently.
- Lia Griffith (craft designer) warns that wrapping the knot over the top of the loop keeps the bow straight, while wrapping under can make it crooked (Lia Griffith).
- Fluff the loops outward and trim tails to your desired length. A YouTube gift-wrap tutorial suggests curling the tails with scissors for a polished look.
The implication: mastering this single-loop bow opens the door to all other styles.
How to tie a prettier bow?
Use wired ribbon
- Wired ribbon is the secret to a bow that stays perky. The DIY Playbook (DIY blog) notes that wired edges hold loops open and keep the bow from collapsing (The DIY Playbook).
- Choose a medium-width ribbon (1.5–2.5 inches) for gifts; wider ribbon works for wreaths and large decorations.
Create symmetrical loops
- Make each loop the same size by measuring against your hand or a ruler. Southern Home and Hospitality (lifestyle site) groups the process into tying the base ribbon, making loops, then securing and fluffing.
- For a full, poufy bow, add multiple loops on each side — The DIY Playbook demonstrates that continuing to add loops of equal size creates volume.
Trim tails at an angle
- Cut the ribbon ends at a 45-degree angle or in a dovetail shape (Martha Stewart (home lifestyle expert)).
- Folding the ribbon in half before cutting creates a double-pointed finish — a trick shared in a YouTube tutorial.
Wired ribbon and equal loops turn a basic bow into a showstopper. The trade-off: you spend an extra 30 seconds per bow — but the result looks store-bought.
The pattern: once you master wired ribbon and symmetry, you can scale the technique to any size bow.
How to make a simple 6 loop bow?
Measure six equal loops
- Cut a length of wired ribbon about 36 inches long. Pinch the ribbon at the midpoint.
- Create three loops on each side, all the same length (roughly 4–6 inches each, depending on desired final bow size). A YouTube bow tutorial recommends sizing loops by wrapping the ribbon around your hand.
Secure center with wire or thread
- Hold all six loops together at the center. Wrap a chenille stem (pipe cleaner) or floral wire tightly around the middle and twist to secure (François et Moi (craft blog) suggests accordion folds at 6-inch increments as an alternative method).
- For a permanent bow, stitch through the center with thread and knot it.
Fan out loops
- Separate each loop and arrange them evenly around the center. Pull loops outward and fluff them up.
- Trim the tails at an angle if you want a clean finish. The tails can be left long or cut short (YouTube gift-wrap tutorial).
A 6-loop bow is the go-to for wreaths, large gift toppers, and home decor. Because each loop is secured at the center, the bow won’t unravel — making it a reliable choice for high-traffic displays.
What this means: the 6-loop bow is reliable for high-traffic displays because it won’t unravel.
How to tie a bow with ribbon gift wrapping?
Attach to package
- Place the midpoint of the ribbon on top of the gift, centered. Wrap the ribbon around the package — first lengthwise, then widthwise — and cross underneath (François et Moi (craft blog)).
- Tie a knot at the top center. An Instagram tutorial suggests pulling the ribbon tight before starting the bow knot.
Tie around box
- Crisscross the ribbon under the package before tying the knot on top — a YouTube video demonstrates wrapping the ribbon around the other side twice, pinching the middle, then tying the ribbons together.
- Use double-sided tape to hold the ribbon in place on the box if needed.
Add extra flair
- Once the base bow is tied, make extra loops using a second length of ribbon and tie them onto the base ribbon (Southern Home and Hospitality (lifestyle site)).
- Fluff and shape loops, then curl the tails with the edge of scissors for a festive finish.
The TikTok tutorial by diywithmaya warns that wrapping the ribbon too loosely leads to a bow that slips. Keep tension even while wrapping the box.
The catch: loose wrapping ruins the bow, so maintain even tension.
How to tie the perfect bow on a dress?
Position at waist or back
- For a sash bow on a dress, place the ribbon at the natural waistline. If the dress has a back sash, center the ribbon at the small of the back.
- A sash-bow tutorial (YouTube) instructs to cross the left ribbon over the right, then loop and pull to form the bow — without twisting the ribbons.
Create even loops
- Form two loops of equal size (one on each side). The loops should be proportional to the width of the sash — generally 1/3 of the ribbon length each.
- Hold the loops at the center and tie a knot by pulling one loop through the gap. Do not twist the ribbon during this step (sash-bow tutorial).
Adjust for fit
- Once tied, adjust the loops so they lie flat against the dress. Pull the tails to tighten the bow against the body.
- You can tuck the tails inside the sash for a clean look, or let them hang naturally for a longer, elegant finish. Hair-bow style tutorials often use two loops secured at the center (YouTube hair bow tutorial).
The implication: for dress sashes, even loops and no twisting are critical to maintain a neat appearance.
“The key to a perfect bow is making sure your loops are even and the center is tight. Wired ribbon is forgiving — it holds the shape while you adjust.”
— DIY blogger at The Ribbon Retreat (craft blog)
“For a 6-loop bow, each loop should be the same length to get that full, professional look. I use a chenille stem to bind the center — it’s stronger than thread.”
— YouTube creator in a bow tutorial video
“When tying a sash bow on a dress, don’t flip or twist the ribbons. Keep them flat — it makes the bow lie properly against the fabric.”
— User on Instagram (My World of Dresses)
For anyone wrapping gifts or adding a finishing touch to an outfit, the ability to tie a clean bow saves time and elevates presentation. Mastering these five techniques means you’ll never struggle with a tangled ribbon again. For the home crafter, investing in wired ribbon and practicing even loops is the fastest path to professional results — or you can stick to the simple single-loop bow for everyday speed.
merriam-webster.com, en.wiktionary.org, youtube.com, youtube.com, instagram.com, youtube.com, dictionary.cambridge.org
For those looking to refine their technique further, stylish ribbon tying tips offer additional inspiration for creating beautiful bows.
Frequently asked questions
What type of ribbon is best for tying bows?
Wired polyester ribbon is widely recommended because the thin wire edges let you shape and hold loops. For small gift bows, 1.5-inch width works well; for wreaths and large decorations, 2.5-inch width gives more volume (The DIY Playbook).
How do I keep my bow from unraveling?
Secure the center with a tight knot. For wired ribbon, twist the wire ends together on the underside of the bow. For non-wired ribbon, add a drop of fabric glue or a small stitch with thread (Lia Griffith).
Can I tie a bow without wire?
Yes, but the loops will be softer and less defined. Use a stiffer ribbon material like grosgrain or satin, and expect to adjust the loops frequently. Southern Home and Hospitality (lifestyle site) notes that non-wired bows are easier for beginners but require more fluffing.
How long should ribbon be for a standard gift bow?
For a single-loop bow on a medium gift, 24–36 inches is typical. For a 6-loop decorative bow, use 36–48 inches. Always cut a bit extra — you can trim tails (François et Moi (craft blog)).
What is the difference between a 3-loop and a 6-loop bow?
A 3-loop bow has one loop on each side plus a center loop; it’s quicker and flatter. A 6-loop bow has three loops on each side, creating more volume and a fuller appearance. Use 3-loop for small presents and 6-loop for gift toppers or wreaths.
How do I attach a bow to a gift without tape?
Wrap the ribbon around the gift before tying the bow — the ribbon itself holds the bow in place. If you need extra security, tie a knot through the box’s ribbon using the bow’s tails. A YouTube tutorial shows crisscrossing the ribbon underneath to anchor it.
How to tie a bow for a hair accessory?
Use thin ribbon (¼–½ inch) and create two loops of equal size. Secure the center with a small piece of thread or a knot. Attach the bow to a hair clip or elastic by wrapping the tails around the base. A YouTube hair bow tutorial recommends using wired ribbon for hair bows to keep the shape against movement.
More related posts
 63 Stunning Short Haircuts for Women to Try in 2026
 YouTube APK Version 20.14.43 arm64-v8a: Download & Install Guide
 South Africa vs New Zealand Match Scorecard: Latest Results
 Where does Elon Musk live? Tiny home & Austin compound
 What Is a Claim? Definitions, Types, and Practical Examples
 52 kg to lbs – Convert 52 Kilograms to Pounds and Stones
 What Movie Should I Watch? Top Picks & Quizzes
 ICE Detains Legal Immigrant Victor Avila: Know Your Rights